First Term Finally is over ....Christmas is near

I do not Love you...

"I do not love you as if you were salt-rose, or topaz,
or the arrow of carnations the fire shoots off.
I love you as certain dark things are to be loved,
In secret, between the shadow and the soul.

I love you as the plant that never blooms
but carries in itself the light of hidden flowers;
thanks to your love a certain solid fragrance,
risen from the earth, lives darkly in my body.

I love you without knowing how, or when, or from where.
I love you straightforwardly, without complexities or pride;
so I love you because I know no other way.
than this: where I does not exist, nor you,
so close that your hand on my chest is my hand,
so close that your eyes close as I fall asleep."


by Pablo Neruda
So this will be my last post of the year. I wish to you all a wonderful Christmas in company of friends and family. PS: this drawing was inspired by Neruda Poem, I scan it and add colour with Adobe Illustrator program. One Hundred Love Sonnets: XVII, There are so many poems Pablo Neruda wrote in his time that speak to me. I have so many of his which are my favourite--but this one is one of the few on my highest. It always gives me goosebumps literally!!! Such an intense soul!!! Hope you like it. Merry Christmas

Ohh Illustrator of mine

Playing with Adobe Illustrator this couple of days, I think I´m not very good at it 


Platinum is my bling

I wanted to try to give a little bit more glamour to my samples so I decided to try add some metallic lustres to the high spots. 


Platinum lustre, comes in a dark, viscous liquid which is painted onto the fired piece. The pot is then fired again to about 850º C and the liquid is burned off, leaving a very thin layer of platinum behind. I can say that this It's expensive to buy.


I also purchase a purple and amber lustre and a thinner to help ideal for thinning and cleaning spills and brushes. I had some issues with the purple lustre since it didn't brighten up enough. So during my research I realized that this lustre its not compatible with my clear glaze. I made this clear glaze specially for this paper clay panels. I wanted a semi-mate clear glaze just to give a touch of shine on my pieces but since its not shine enough the purple lustre doesn't work very well. so I need to rethink the recipe or use a ready made clear glaze.


This one has Platinum and purple lustre, it looks really pretty, the photo doesn’t really do it justice.

Making a PaperClay Bowl

Cellulose and Porcelain Paper-clay, I add 5% of turquoise stain to some of the paper clay to build the walls

Printing on clay

Panel samples made with different paper clay recipes

Nylon/Porcelain PaperClay


Blue Kitchen Roll/Porcelain Paper Clay


Papyrus Paper/Porcelain Paperclay

First testing samples

This are my first samples on paper clay. Thinking about texture and colour. For this recipe I used Cellulose paper and for colour I add to the paper Slip Turquoise , Butter Yellow and lilac stains .


On my first sample I used 5% and on my second only 2% of the stain. . I prefer the 5% Turquoise and the 2% of the yellow. The contrast between the two colour looks much more compose. Not very happy with the lilac result. I was hoping obtaining a more vibrant colour , maybe if I increase the percentage.


What are you cooking good looking!?!?

Making Porcelain Paper clay:

I recently found out that Paper clay has many advantages since increased pre-firing strength, The translucence of the porcelain will work as a bonus for me. I love to make thing the thin as possible. and make the clay reach its limit  and adding the paper to this equation seems te best way to go. reduction in warping, increased joining capacity in both wet-to-wet joints and dry-to-dry joining and the  translucence of the porcelain  work as a bonus for me. Paper clay has made a whole array of techniques available to me that I could not have thought of even a year ago. Since my project involve some wall panel I want them to be light as possible, and here's where the paper clay takes an important part. With Super thin building techniques and the high firing  I´m hopping to make the panels light as possible, 


So my research starts with finding the best paper clay recipe using different papers or fibers. Its possible to buy  ready made paper clay but I prefer to make my own . All types of paper can be used for paper clay. Many people use toilet paper because it is very fine milled paper and is easily broken down in the mixing process. There is a very good reason not to use this paper source. When broken down in the clay mixture, the paper will begin the process of rotting. Believe me I know. The smell almost killed me. Alternatively you can use news Paper, it's cheaper and a good source of recycling material. The down size of using newspaper is that you need to boil the Put the paper in hot water r until a thin paper pulp is achieved and Strain the pulp and add it to the clay mixture. It is very hard to break down this paper pulp. I need to boil the paper at least three times.

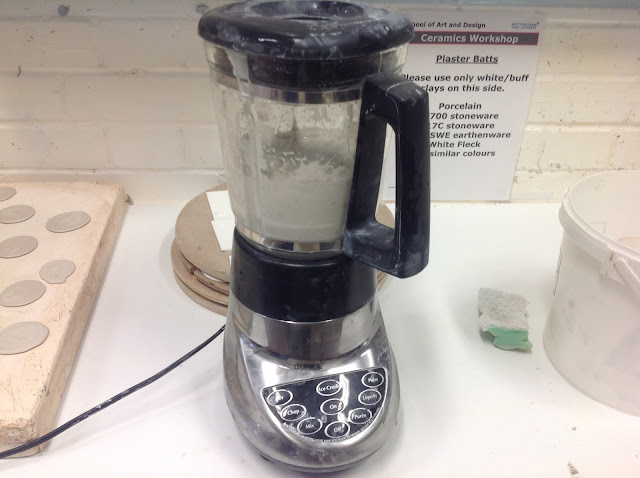
So for now I use three different recipes with different fibers with unique results. On my first batch I mixed cartridge paper to the clay , I left the paper on hot water over night to break it down and then added to my slip (that I made previously) and I use a Old food processor to mix it all together and to make the slip really soft with no lumps. 

My second recipe consisted in a mixture of nylon fibers, very difficult to break this down since basically you are trying to break down plastic (so basically is more like fiberclay insted of paperclay),  I add 15g to my slip and once again I use the blender to mix it all together (difficult process as well, I almost thought that the blender was going to die. 

My third recipe and the easiest one. Adding Cellulose Fibers to the clay. One bag of 1Kg costs around £6 and should be enough for almost any size studio. I add 5% by volume to my slip. I put the paper clay pulp on plaster slabs and after wedged  it was ready to use.


So far the Paper Clay with the Cellulose fiber its my favorite because its the easiest to make. Its very stable and the end result very satisfactory. A was very surprised with the nylon fibers. When I was trying to make the samples, it almost looks like a piece of fabric. very difficult to cut with the scalper, I had to use a par scissors in the end but the final result was very satisfied.


  I can definitely see great potential in using it in my future projects. Is easy to fire as it is very forgiving, EXCEPT! there will be smoke and bad smells up to 1000ºC degrees .

Printing on clay I

For this process I applied velvet underglaze on the plaster and pressed a slab of clay on it using a rolling pin


Carving the Plaster Slab

Using a soft mechanic pencil I draw my design directly on the plaster.I then carve my design into the plaster, keeping in mind that anything carved into the plaster will end up as a raised area on the final slab. 
I
 like to carve the mold while the plaster is still a bit damp since it is softer at this point and easier to carve.  It also leads to less dust.  Still, there are drawbacks to this method.  When transferring your design, it is very easy to mar the surface of the plaster with your pencil or scribing tool.  The ink from markers will bleed a bit, and pencils sometimes do not draw very well on wet plaster.  Also, if you use a paper template, the paper will become damp and warp a bit as you trace your design.  If you carve your mold when the plaster is completely dry, take precautions to minimize your exposure to the dust and use a mask.


Once my design is carved I make sure all the plaster dust has been cleaned out of the cavity since any plaster contamination will ruin a final ceramics piece! There will still be a bit of plaster residue left, so I press my first tile with some scrap clay.  


Making Plaster slab

Ordinary pieces can become quite extraordinary when we add texture in them! The most common way to make texture is by impressing various objects into the clay. One of the ways is by using plaster slabs and carving patterns on to it. 


I started by joining four pieces of wood into a rectangle frame and reinforce and connect the joints with clay into the sides and edges. Place the frame in the middle of a clean sheet of glass.  


Measure the water first when mixing, and put it in a plastic bucket . I Sprinkle the plaster lightly and slowly into the water to prevent it from clumping (for me its always messy this part lol).  Stir the mixture by hand. The stirring should be done in such a way as to agitate the mixture and drive out air bubbles. It´s important to not whip or whisk the mixture. The point is to get  the air out, not in. A good method of stirring is to put the hand, palm upward, on the bottom of the pail and wiggle the fingers vigorously. I Continue to mix for two or three minutes until i felt the  plaster  begin to thicken. 


On the table with an absolutely level surface, I pour the plaster evenly into the frame so that when the plaster flows it will make a layer of even thickness. Then I bump the table vigorously immediately after pouring to get the plaster to flow into all the corners of the mold and for air bubbles rise to the surface. I let it set for 30m/1h. After that I safely remove the wooden frame and lift up the slab. It’s now ready for carving

Lines and emotion

Black and white mark making fantasy through nature exploration/narrative/storytelling . I don't aim for perfection because life isn't perfect. The lines represent my emotions. Some are carefully drawn while others reflect my impatience and tiredness . Still a work in progress

My initial ideas

The Inspiration and initial ideas for this project stemmed from the summer spend with my godsons and brothers telling stories and walking through the forest and beach at a Victorian village in Conwy, north of wales.  I intend on developing my work based around my drawings developed during that time and examining the form, patterns, and shapes inspired in that environment. 

It´s good to be back!!!

Where does the time go? One minute you’re excitedly starting our first Uni year and in a blink of an eye Third year finally arrived!!! I’m sorry I haven’t been blogging more, too much time working over the summer and enjoying the outdoors, and now I’m furiously working on whatever has currently captured my attention. I have some new ideas that I want to explore this year, I want to be inspired by life around me instead of trying to reach targets and meet expectations with materials. I want to get into an idea and explore it the best way I can, explore, develop, expand and get excited about all the new things I discover along the way. I also want to try to explore my illustrations  using ceramics as my main medium since it has been a true love of mine for over past four years. Being able to manipulate clay into new forms is such a beautiful way to express yourself. So now It’s time to let the exploring begin.

The last Life drawing session of the year

So this are some drawing that I did In our last life drawing session.
Since is our last  session of the year, it  was a lot more open to interpretation and I found it very relaxing. Using continue line and spending less than 30 minutes in each drawing, allow me to develop a  new way of drawing and it also taught me that things don't have to be perfect. I´m actually going to miss this learning sessions

You can see more developments at my life drawing page

15 minute sketch using a fine black pen (05mm) and blue marker , pattern edited in Photoshop


Deadline

Today its project 4 deadline so it's time to set all our work in the table for assessment next Monday.

I decided that my table presentation should have a botanical/marine life /naturalist look.
I must say I love the whole vibe of the space like this. Maybe it´s like a visit to the natural history museum? I don't know. Whatever it is, I like the vibe very much.
Some of my samples were displayed as jewellery prototypes. There´s  a lot of potential in it.


I also manage to frame all my illustrations and lino/tile prints and they look so professional. I´m really happy with it.
Unfortunately my plant pot vessels were still in the kiln by the time I set the table, so only be displayed next Monday during the assessment.


Barnacles

Sea barnacles inspired porcelain/paper clay vessels. My vessels are made of fine porcelain and paper clay and I use lino print for the patterns inside and plaster slabs for the textures outside. For colour , instead of normal glazing I use stain pigment diluted in water and splash it around each piece wile the clay was still wet to create a watercolour effect, then they were fired at 1000ºc, poured with clear glaze and then fired at 1260ºc.


Plant pot Vessels


  Here they are, out of the kiln, safelly intact and ready for glazing


Glazing and colour

Experimentation: texture and Glazed simples - Blue\green\ purple crystal glaze and stains. 

Photo


Photo


printing ,mark making and building on clay


Pressing clay on the plaster slab to creat textures and using clay slabs to build vessels.


© Copyright 2015 Andreia Rodrigues